Agentic website setup guide
Section 1 of 4 · Create projectStep 1 of 31
Exit1
Open the Developer Platform
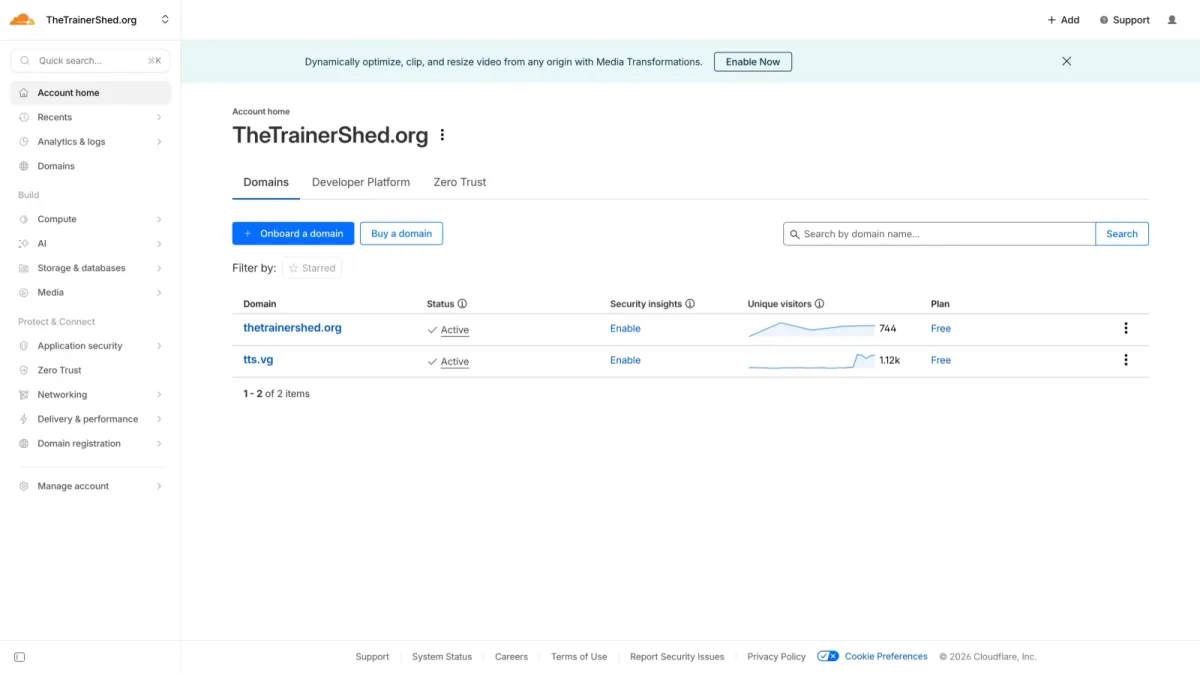
Log in to your Cloudflare dashboard. On the Account Home page, click the Developer Platform tab at the top.
2
Create an application
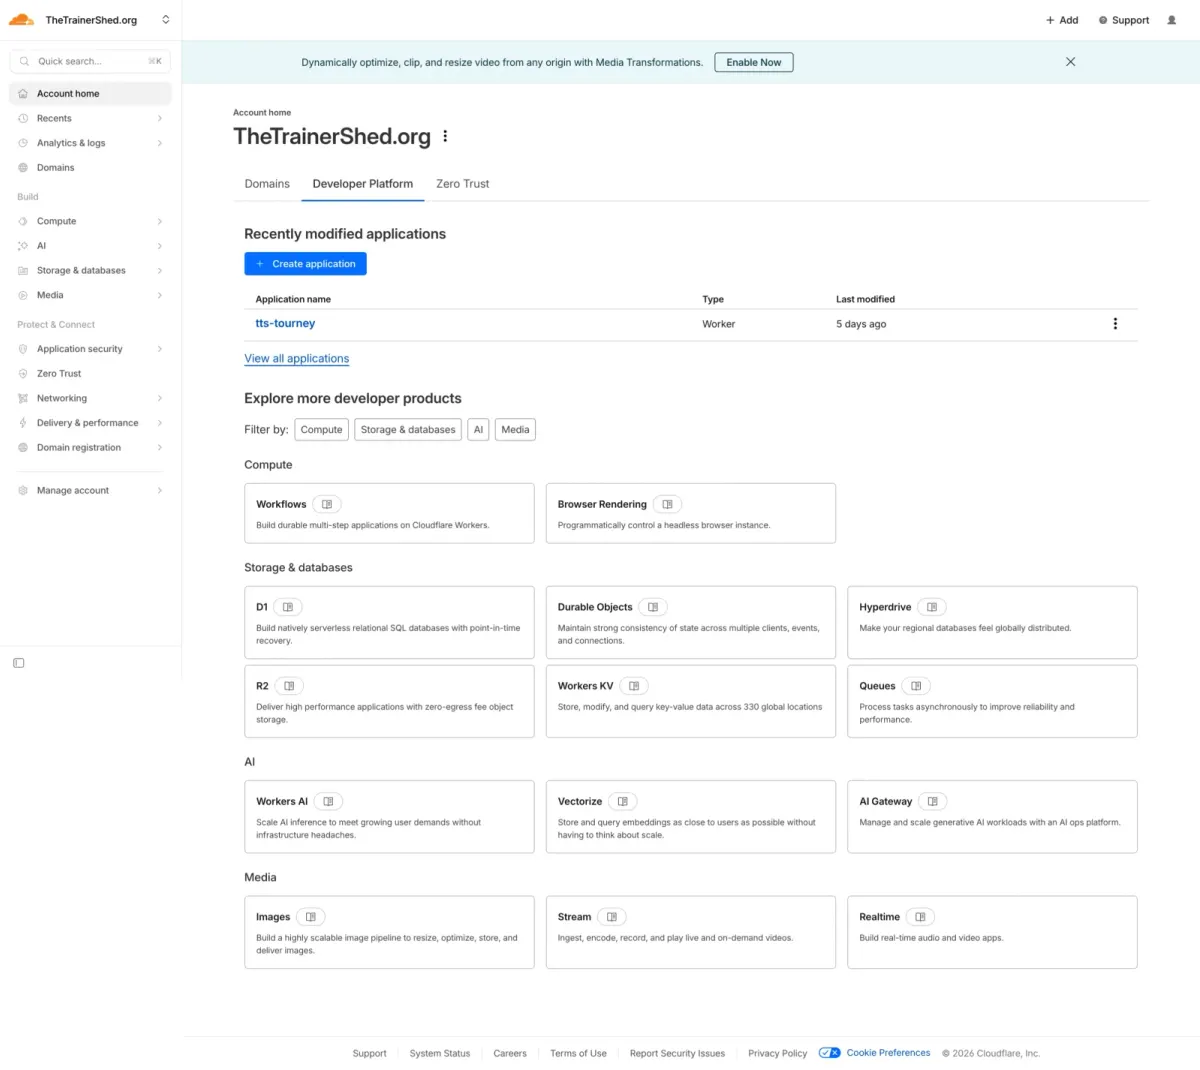
On the Developer Platform page, click the + Create application button to start setting up a new Worker.
3
Select a template
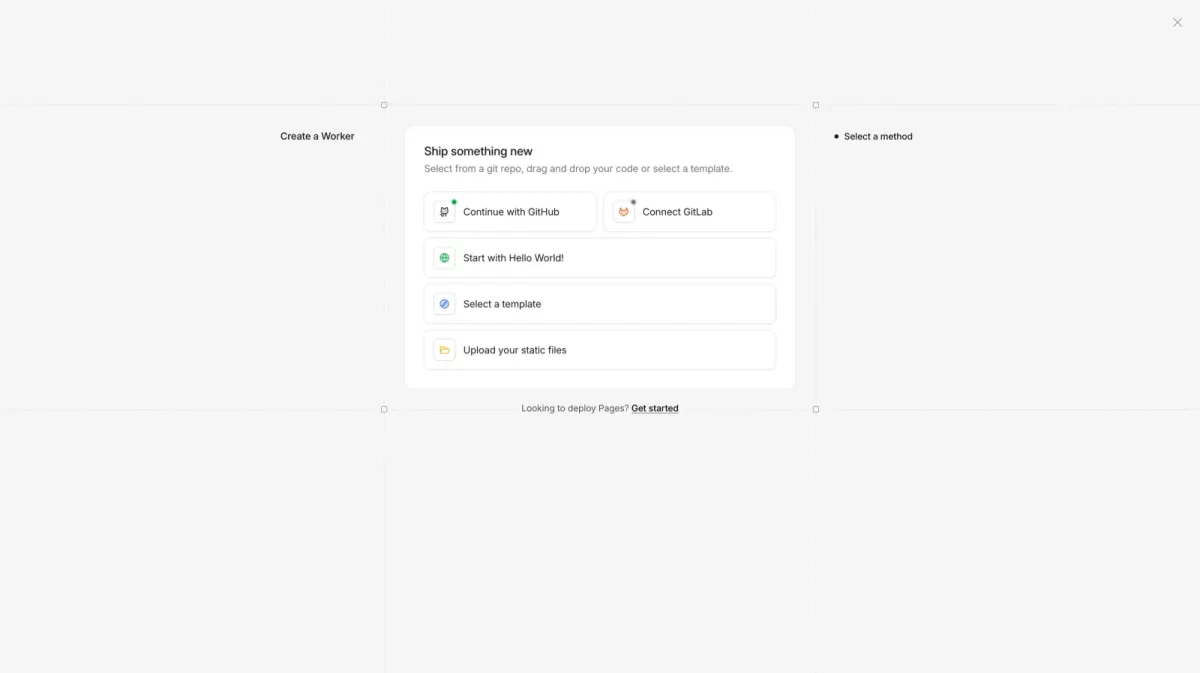
In the "Ship something new" dialog, click Select a template to browse the available framework starters.
4
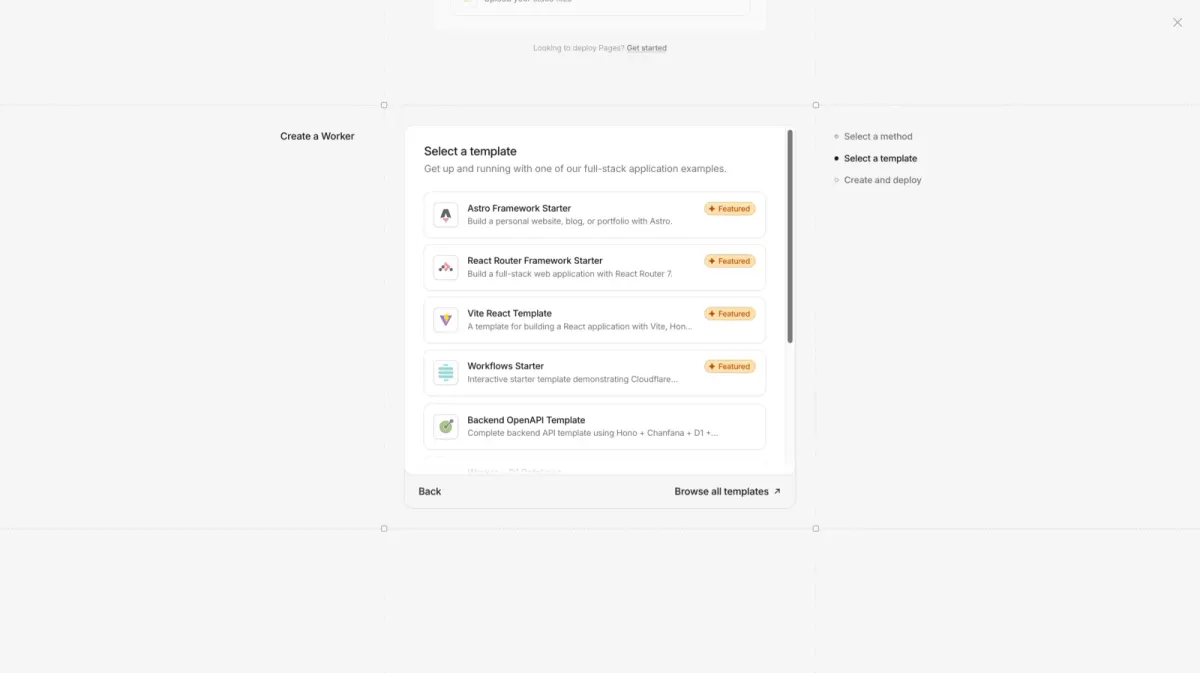
Choose the Astro Framework Starter
From the template list, select the Astro Framework Starter (marked as Featured). This gives you a ready-made Astro project configured for Cloudflare Workers.
5
Set up your application
On the "Set up your application" page, configure the following:
- Git account: select your GitHub account or organisation.
- Create private Git repository: keep this ticked unless you want your code to be public.
- Project name: use lowercase letters and hyphens only (no spaces).
Once everything looks right, click the Deploy button.
Tip: choose a descriptive project name like
my-org-website. You can always connect a custom domain later.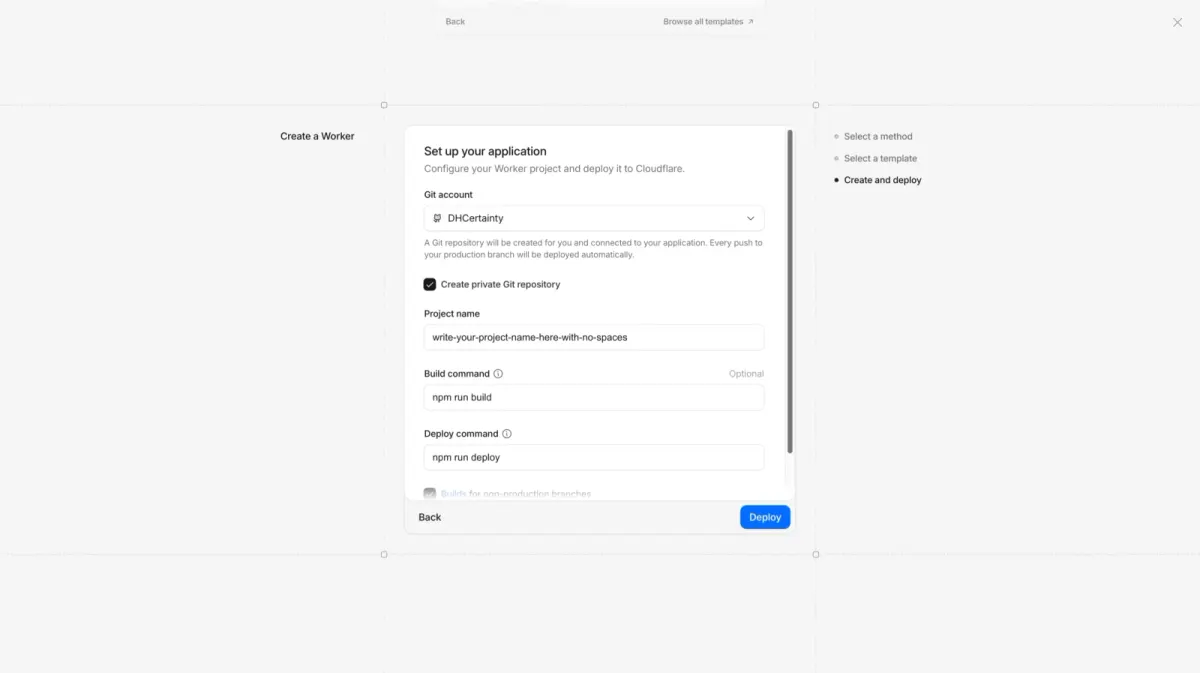
6
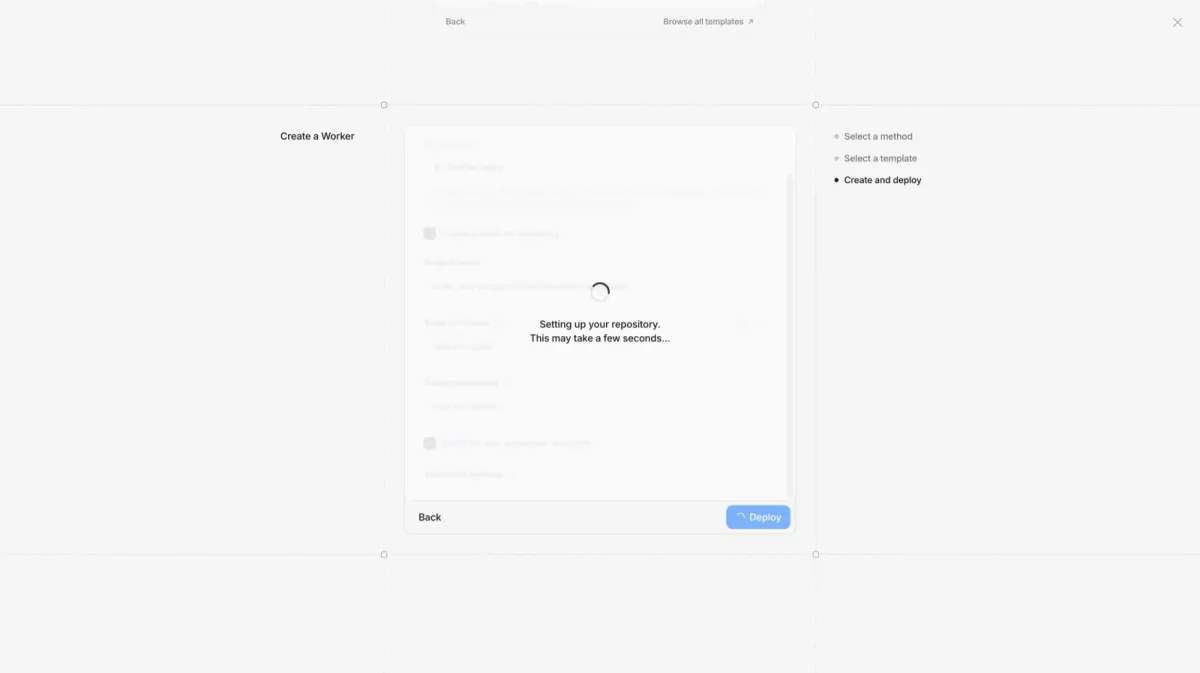
Deploying
Cloudflare is now setting up your Git repository and deploying your project. This takes a few seconds, so wait for it to finish.
7
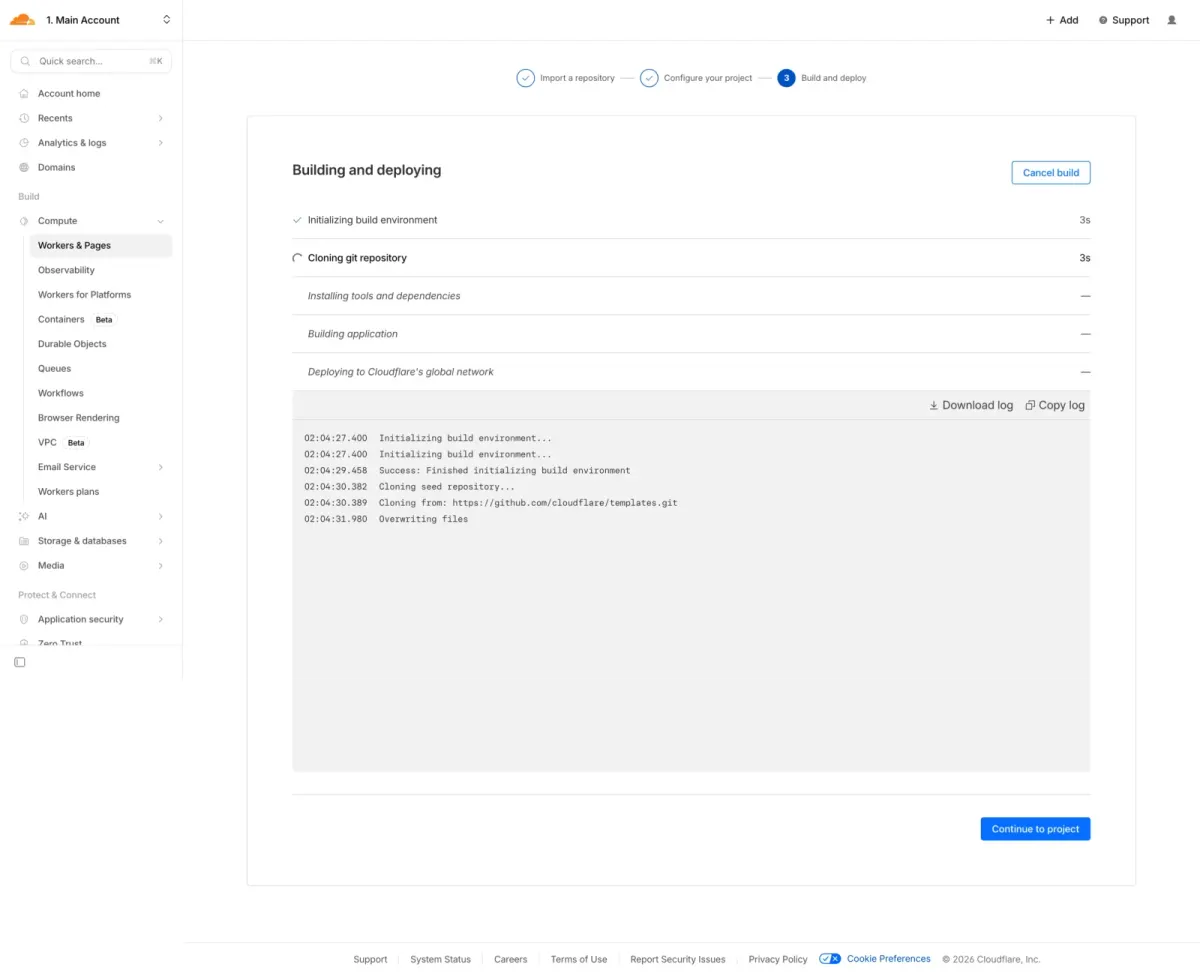
Deployment complete
Wait for the build and deployment to finish. You'll see the build logs showing each stage. Once it's done, click Continue to project to view your new Worker.
8
Project overview
The overview page shows your project's metrics, bindings and deployment history. Note your
.workers.dev URL at the top: this is your live site address. Click Settings to continue.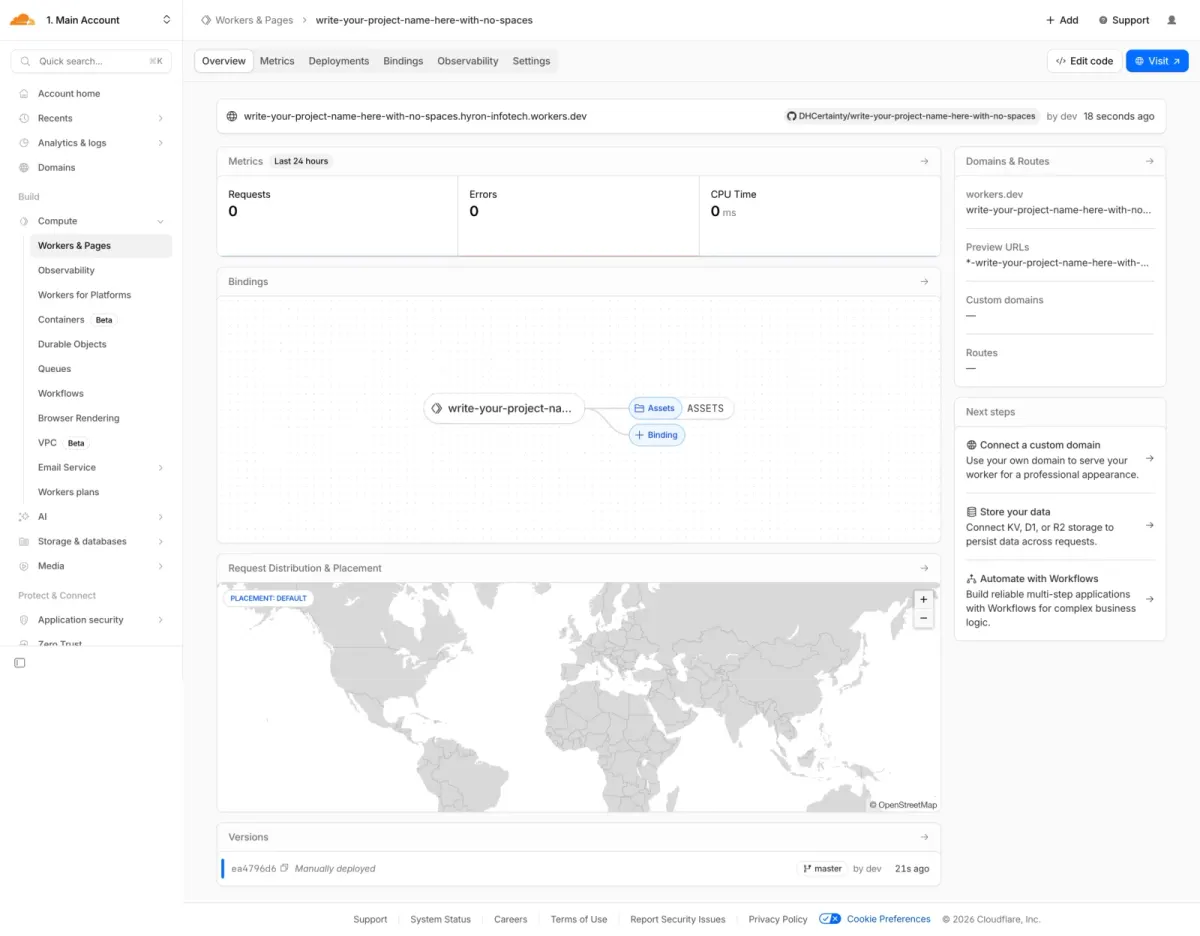
9
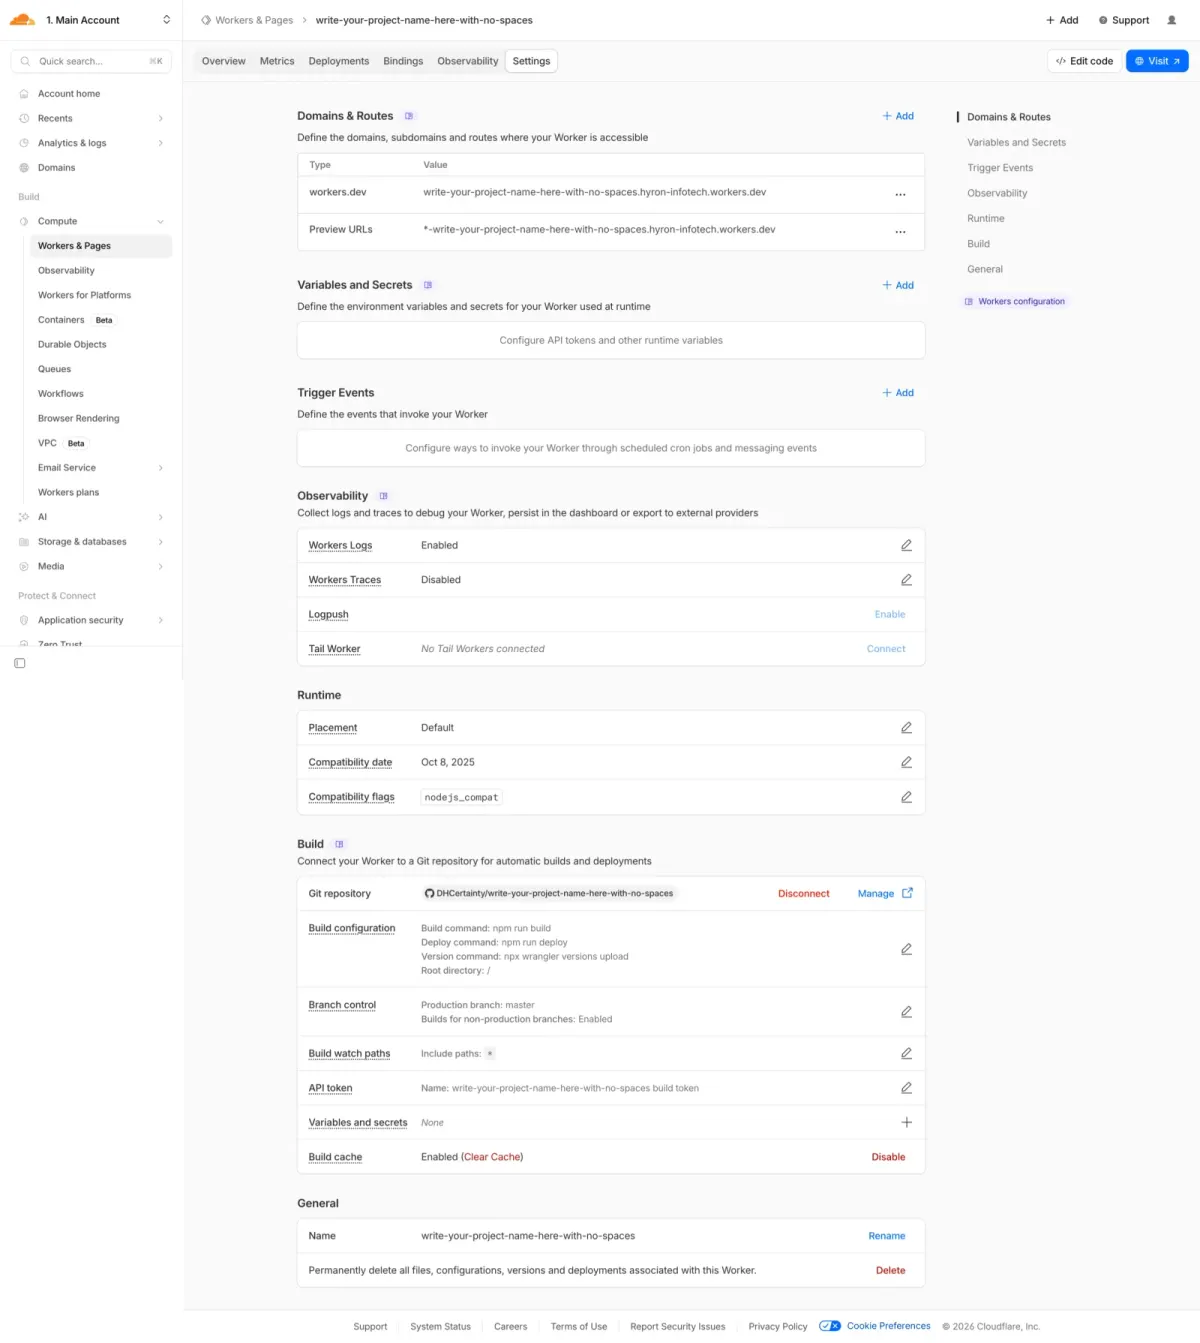
Open Domains & Routes
In the Settings tab, click + Add next to Domains & Routes to add a custom domain.
10
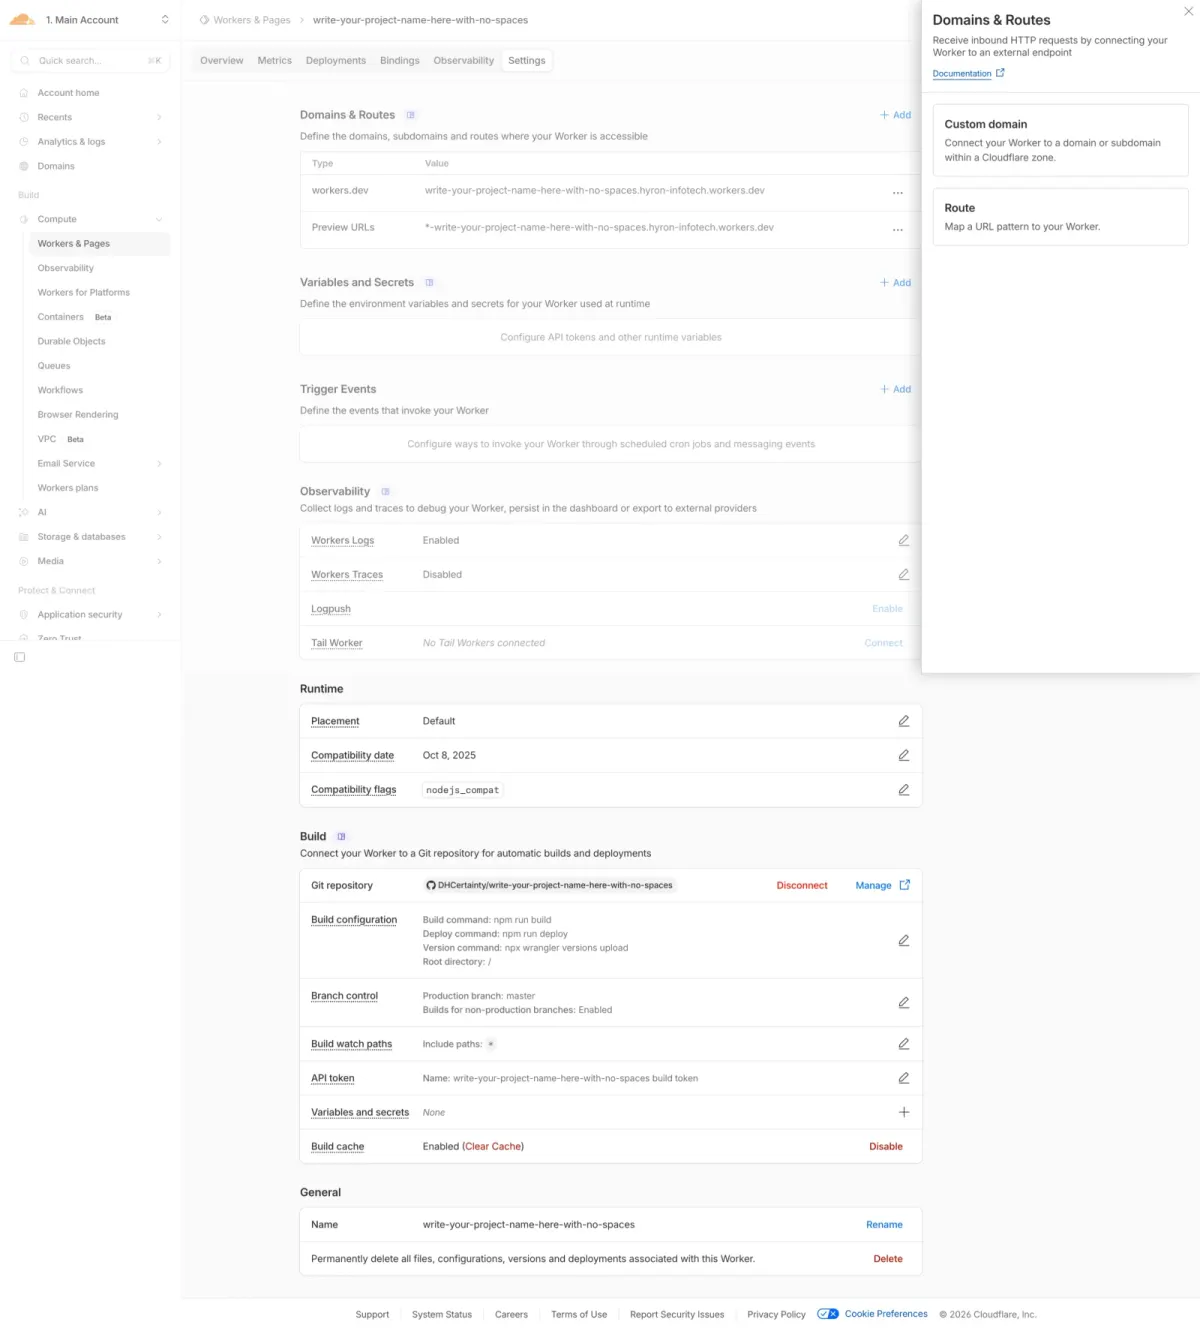
Select Custom domain
A panel opens on the right. Select Custom domain to connect your own domain or subdomain to this Worker.
11
Add your custom domain
Enter the domain or subdomain you want (for example
choose-a-subdomain.dhcy.sg). Cloudflare configures the DNS record and provisions an HTTPS certificate for you. Click Add domain to save.Note: the domain must be in a Cloudflare zone you control. Remember to update your
wrangler.jsonc file too, so your local setup stays in sync.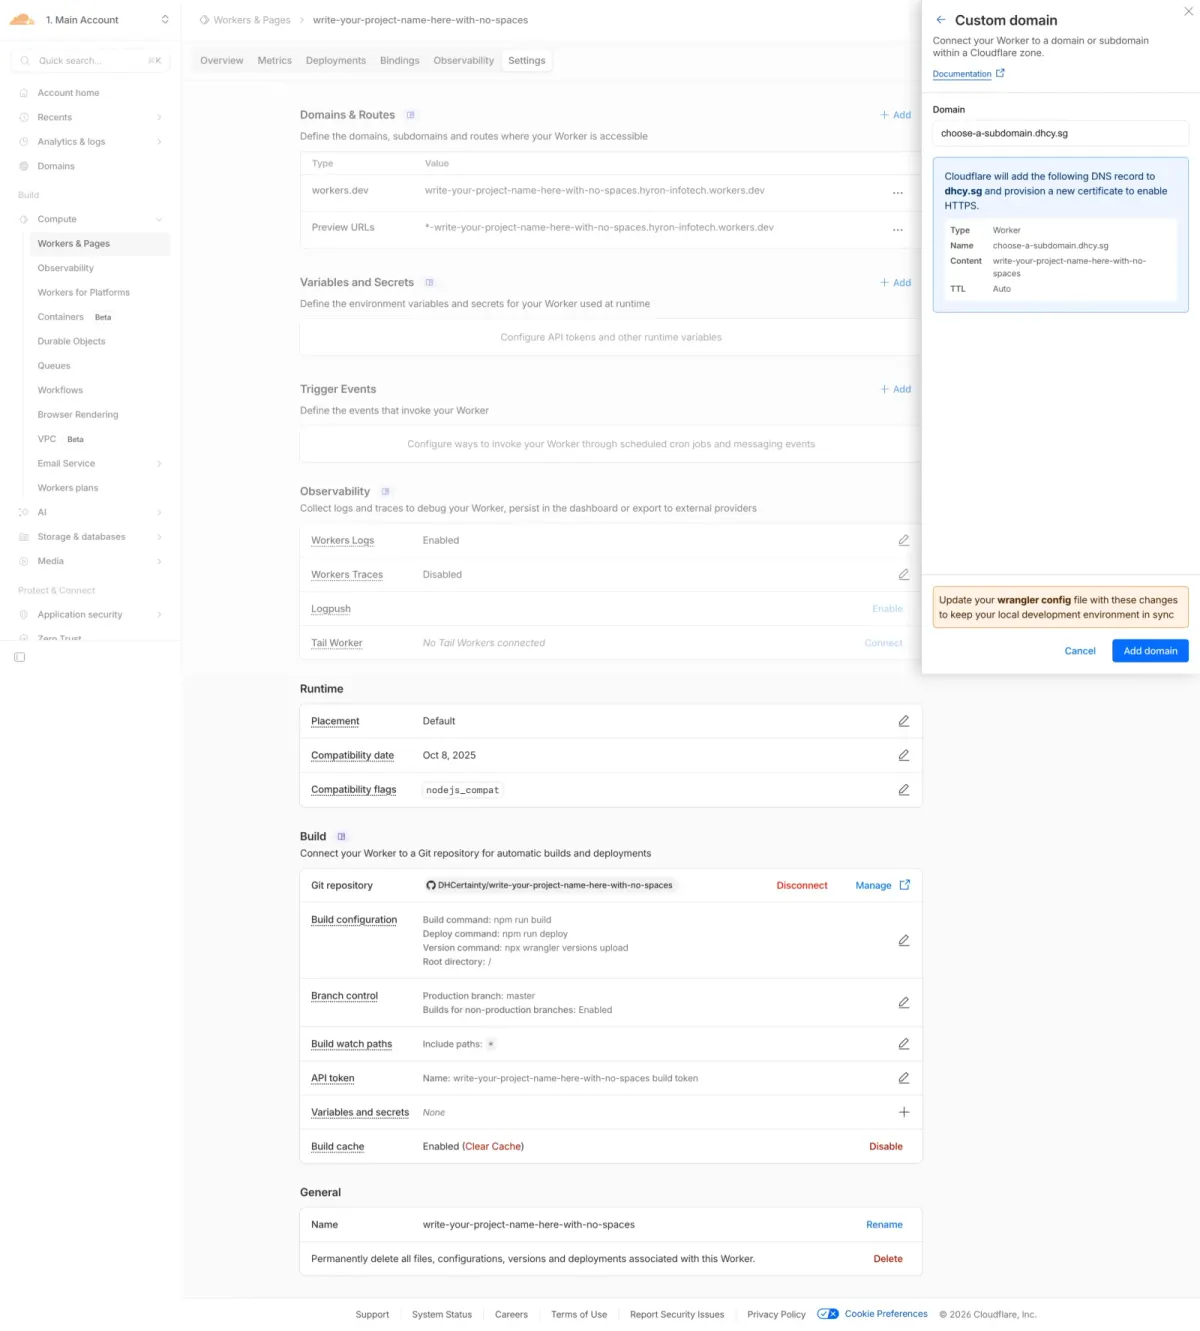
12
Open your Git repository
Scroll down to the Build section and click the Git repository name to open it on GitHub.
What's next: GitHub opens in a new tab. You'll copy the clone URL from there in the next steps.
13
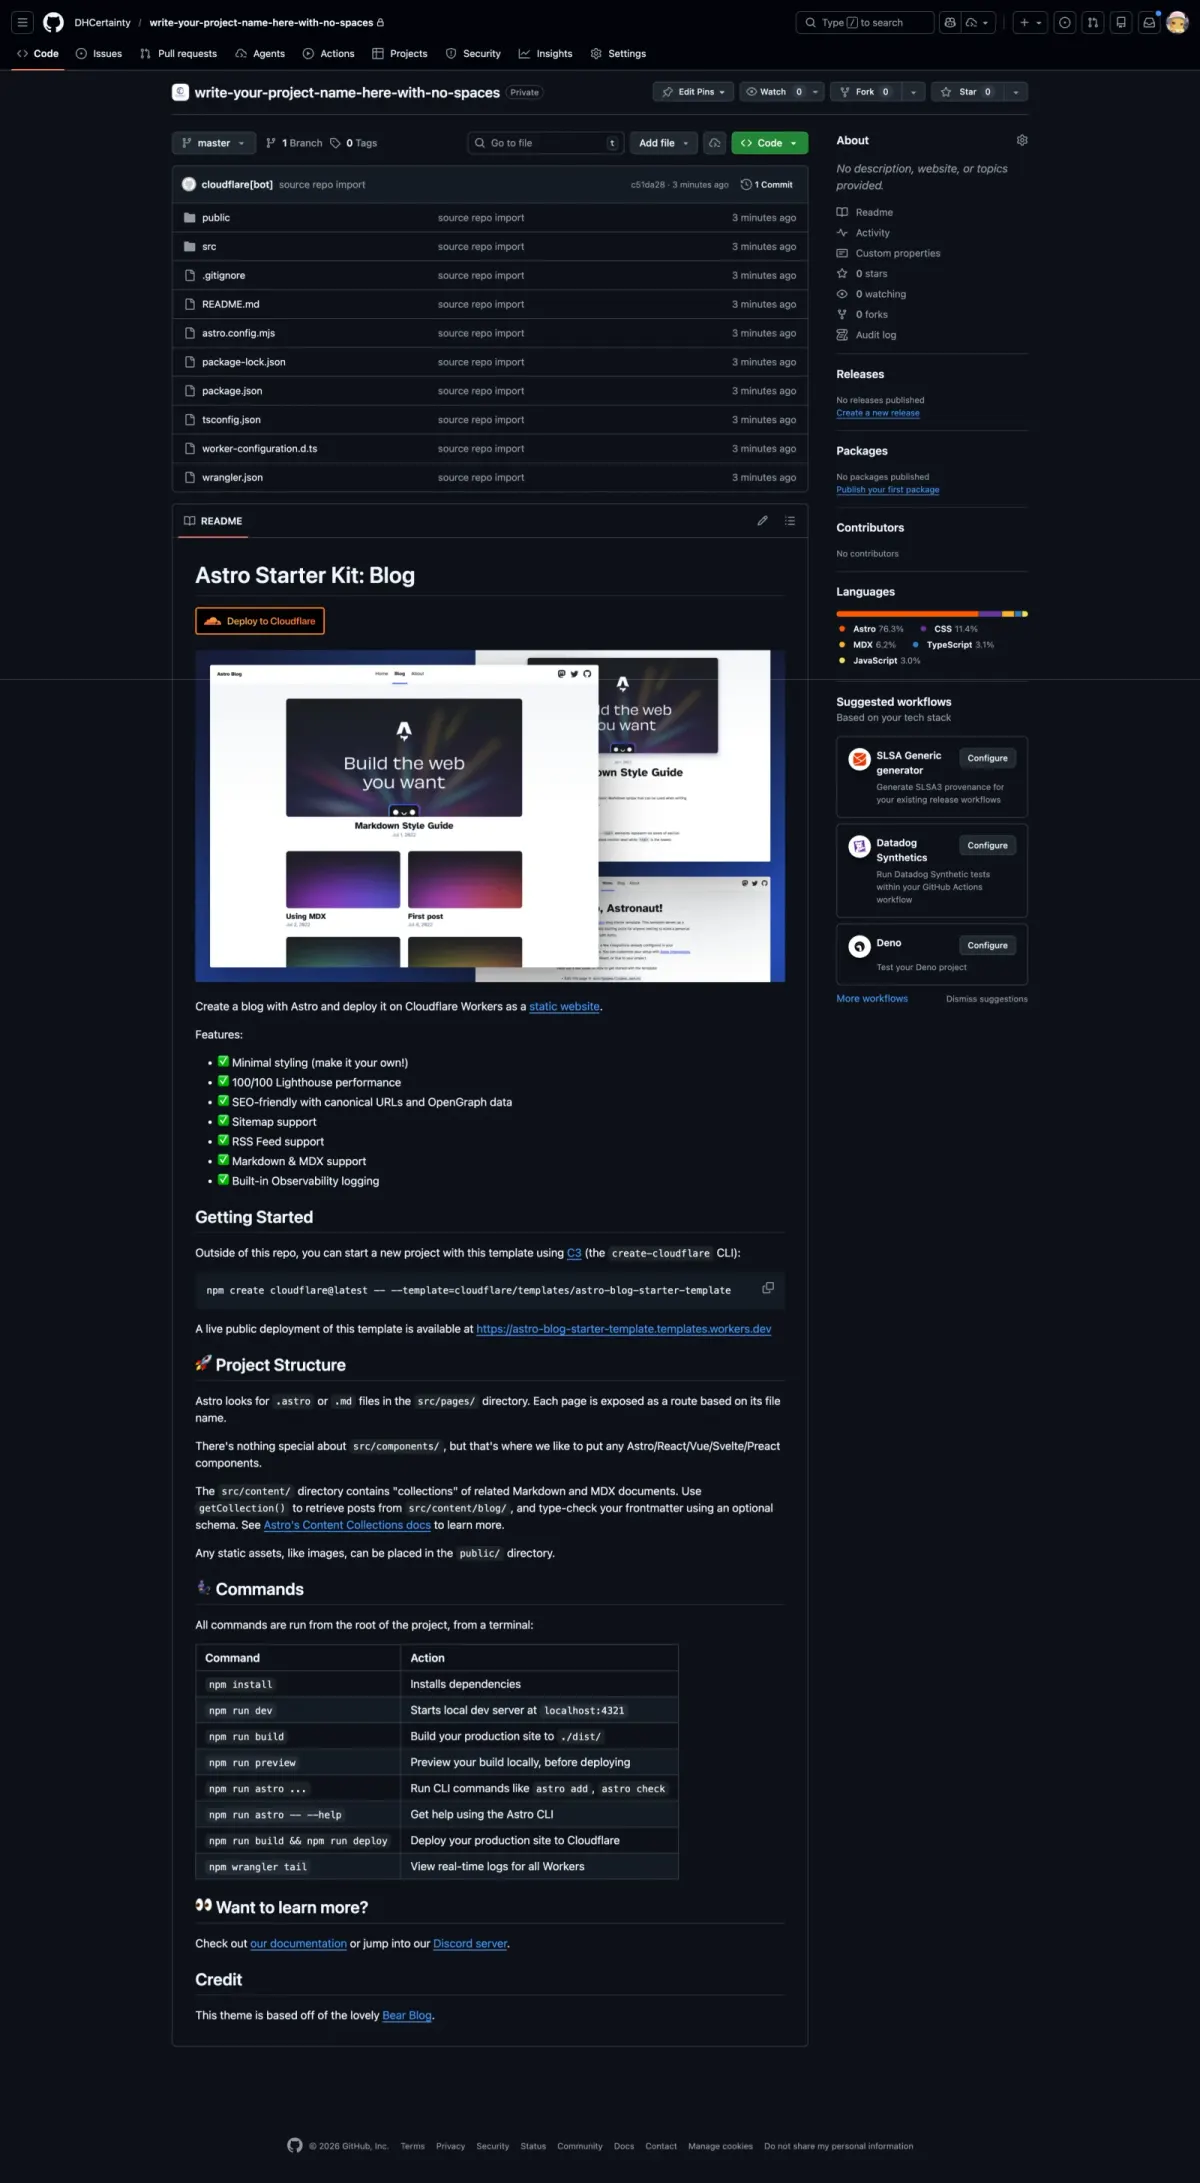
Find the clone URL on GitHub
On the GitHub repository page, click the green <> Code button to reveal the clone URL.
14
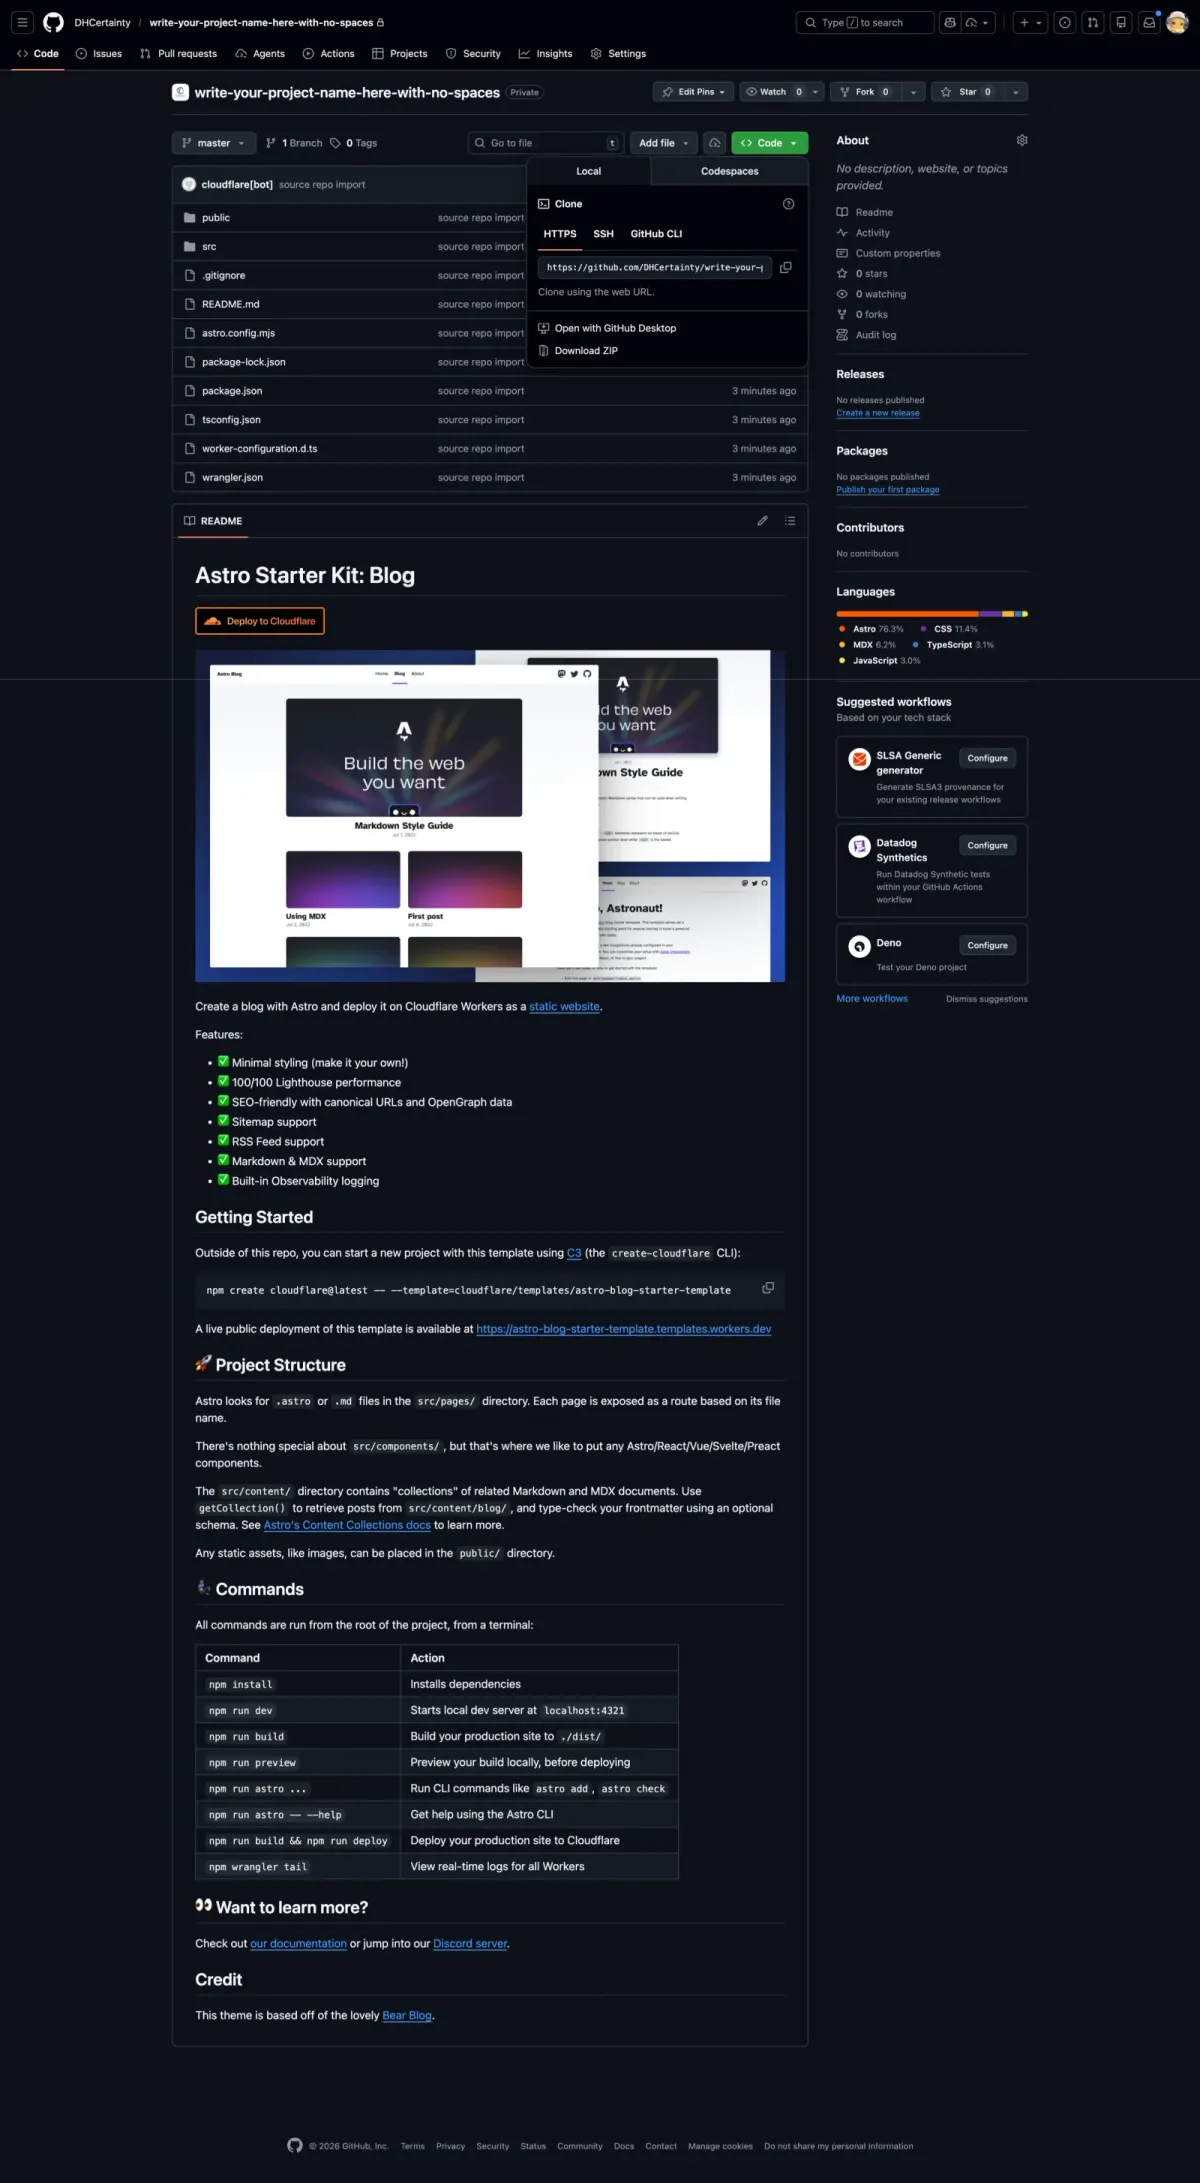
Copy the clone URL
Copy the HTTPS clone URL from the dropdown. You'll paste it into Antigravity to connect your repository.
Tip: click the clipboard icon next to the URL to copy it in one go.
15
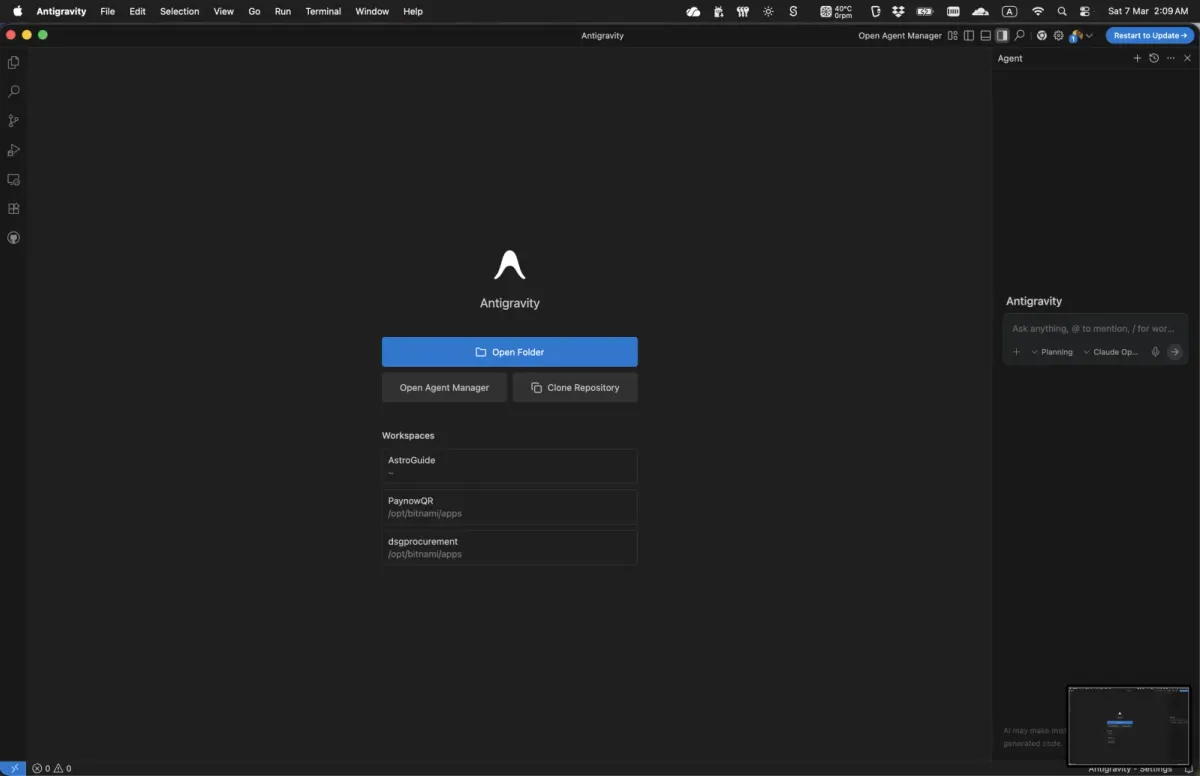
Open Antigravity
Open Antigravity. On the welcome screen, click Clone Repository to connect the GitHub repo you just created.
16
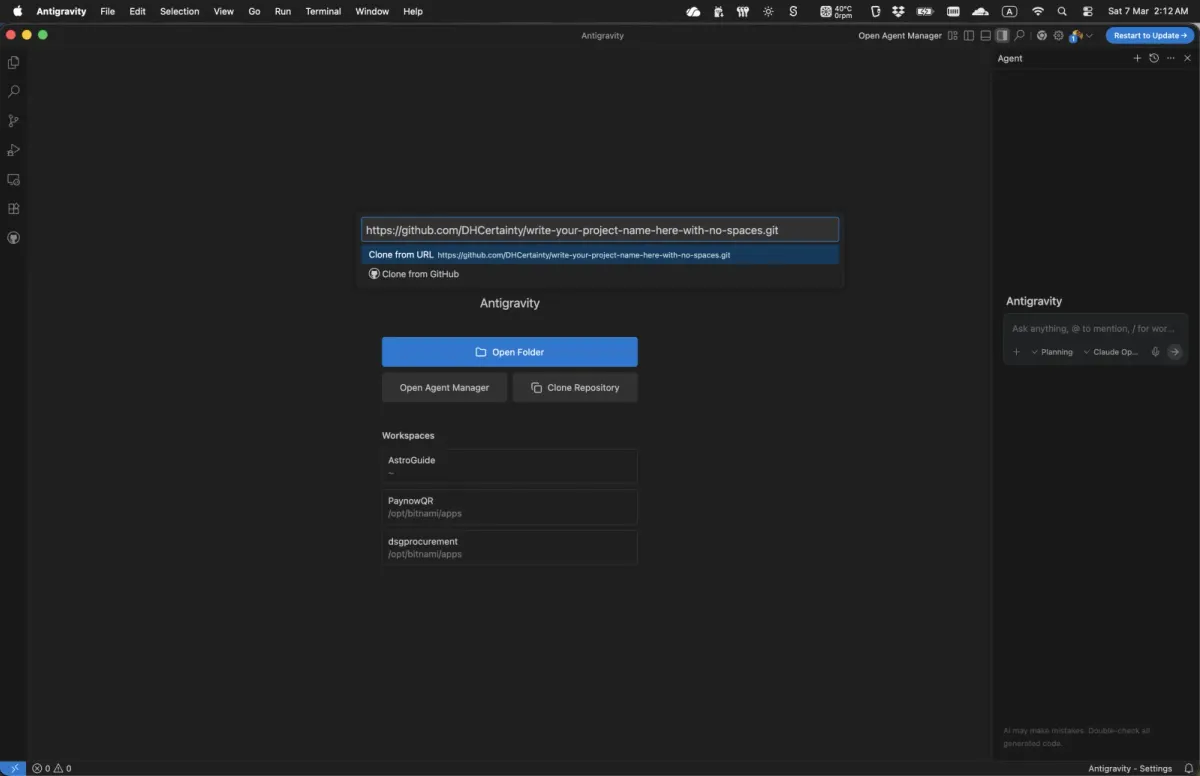
Paste the clone URL
Paste the HTTPS clone URL you copied from GitHub, then choose Clone from URL from the dropdown.
17
Choose where to save it
Choose a folder on your computer for the repository, then click Select as Repository Destination.
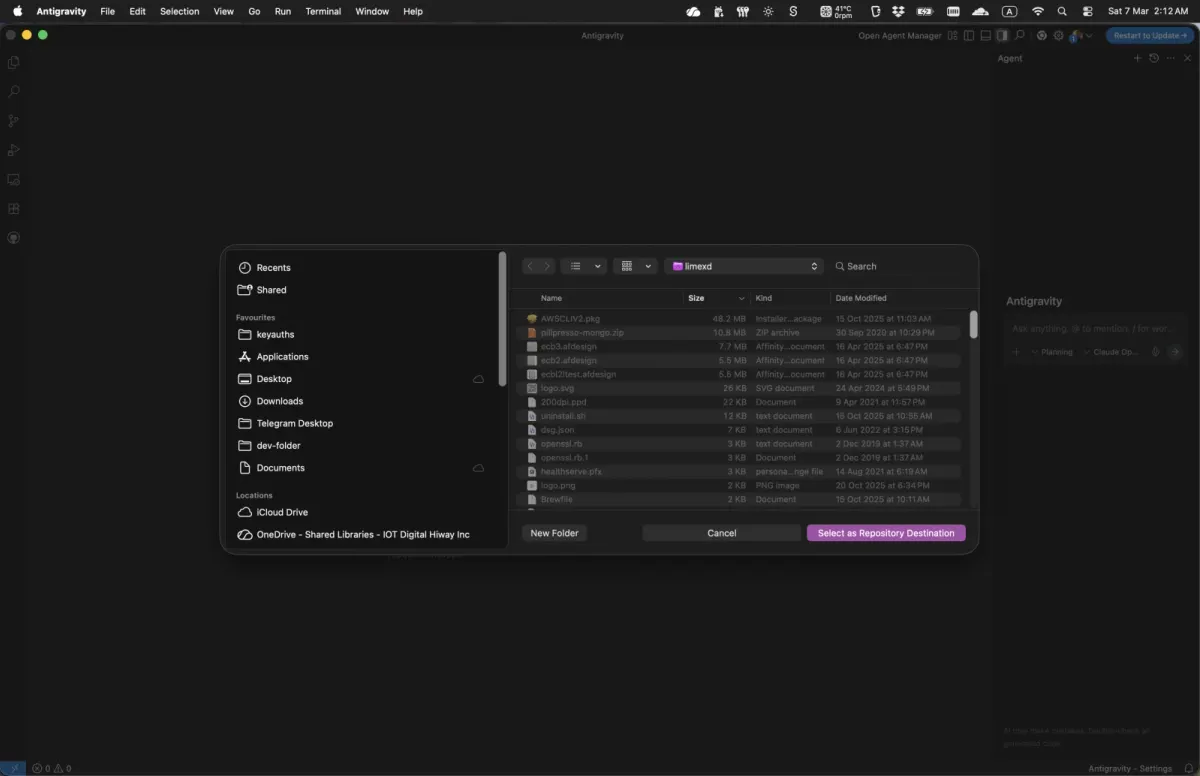
18
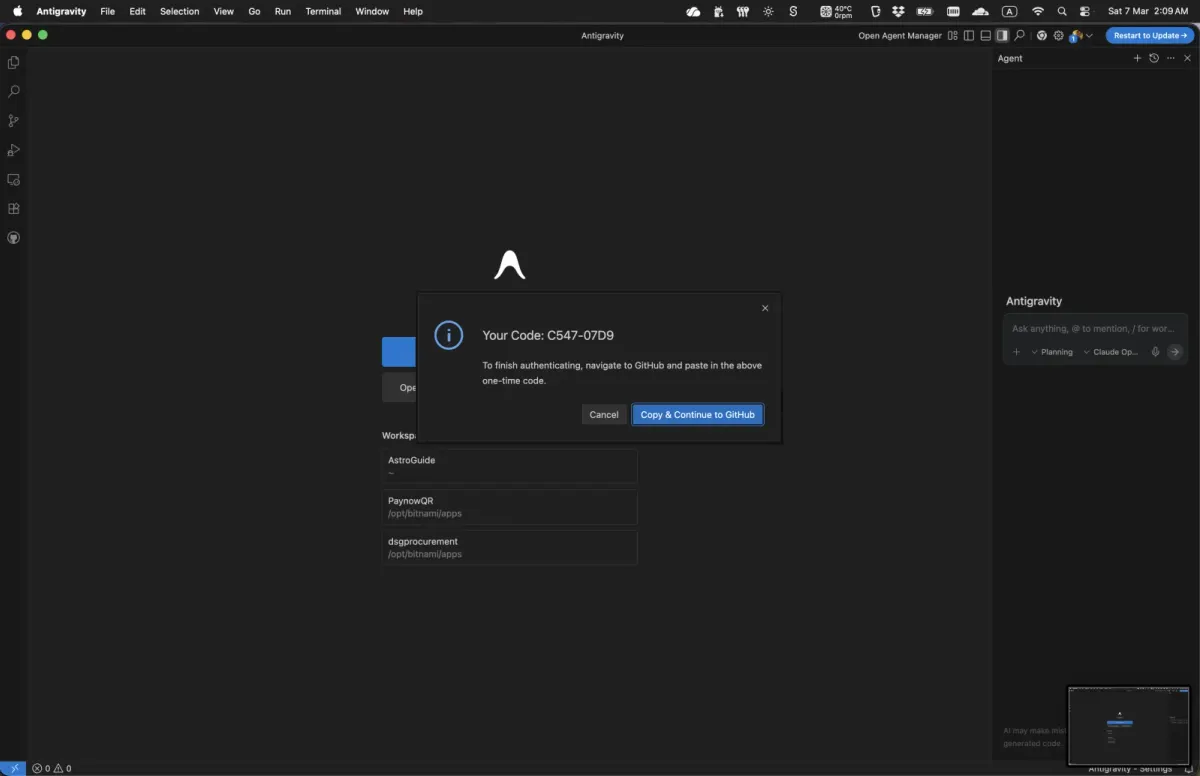
GitHub authorisation prompt
Antigravity needs access to your GitHub account to clone the repository. If this is your first time using it, a dialog asks you to authorise through GitHub. Click Open to load the GitHub device activation page in your browser.
19
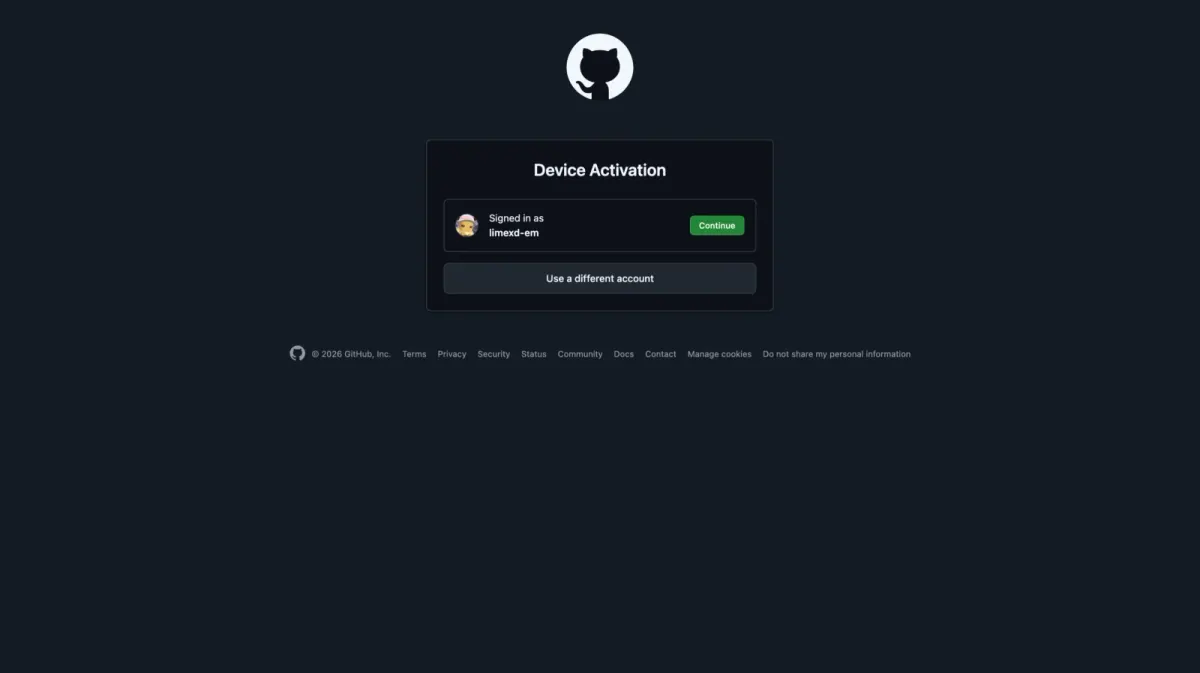
GitHub device activation
A GitHub Device Activation page opens in your browser, and you may be asked to log in to GitHub. Once you're in, click Continue.
20
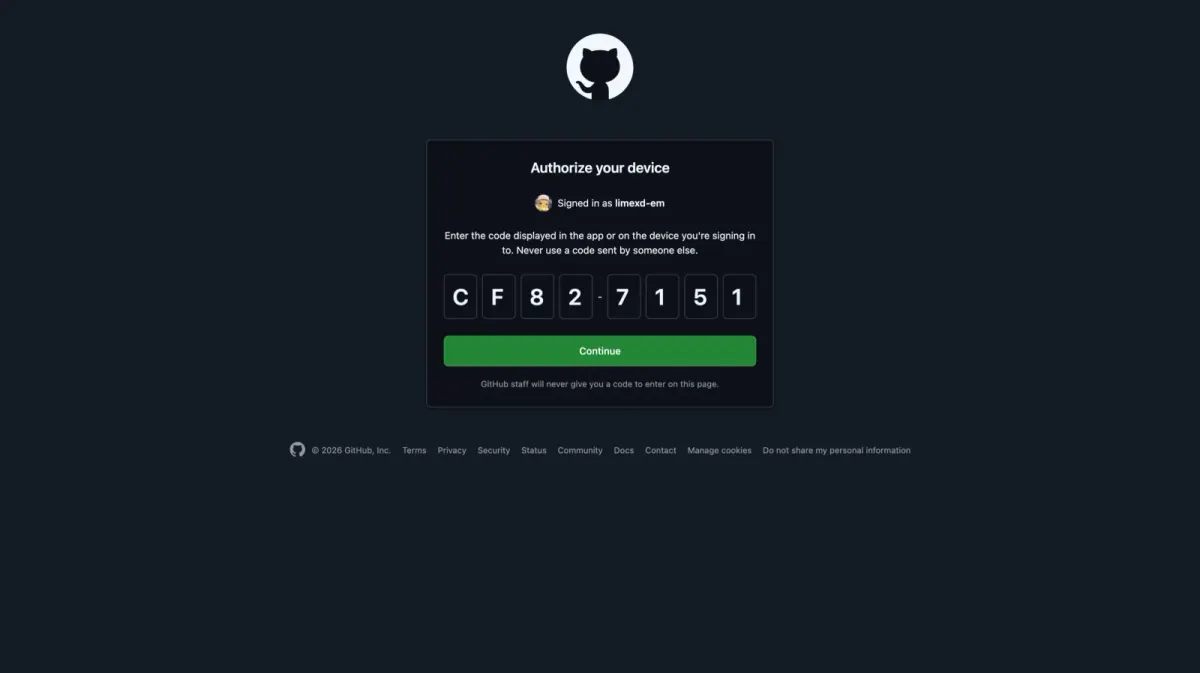
Authorise your device
Paste in the device code, then click Continue to authorise the connection.
21
Authorise Antigravity
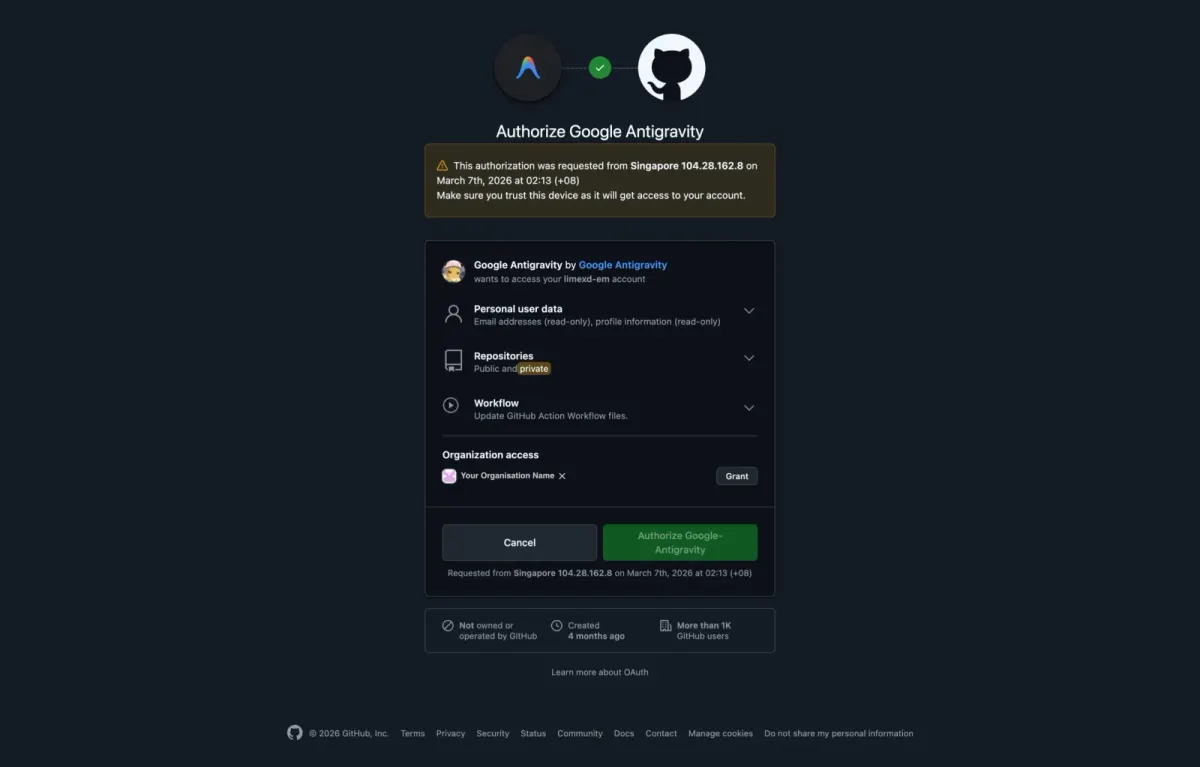
Review the permissions Antigravity is asking for. Under Organization access, click Grant for every organisation you need, then click Authorize Google-Antigravity.
Important: if you skip granting organisation access, you won't be able to see or work with your organisation's repositories.
22
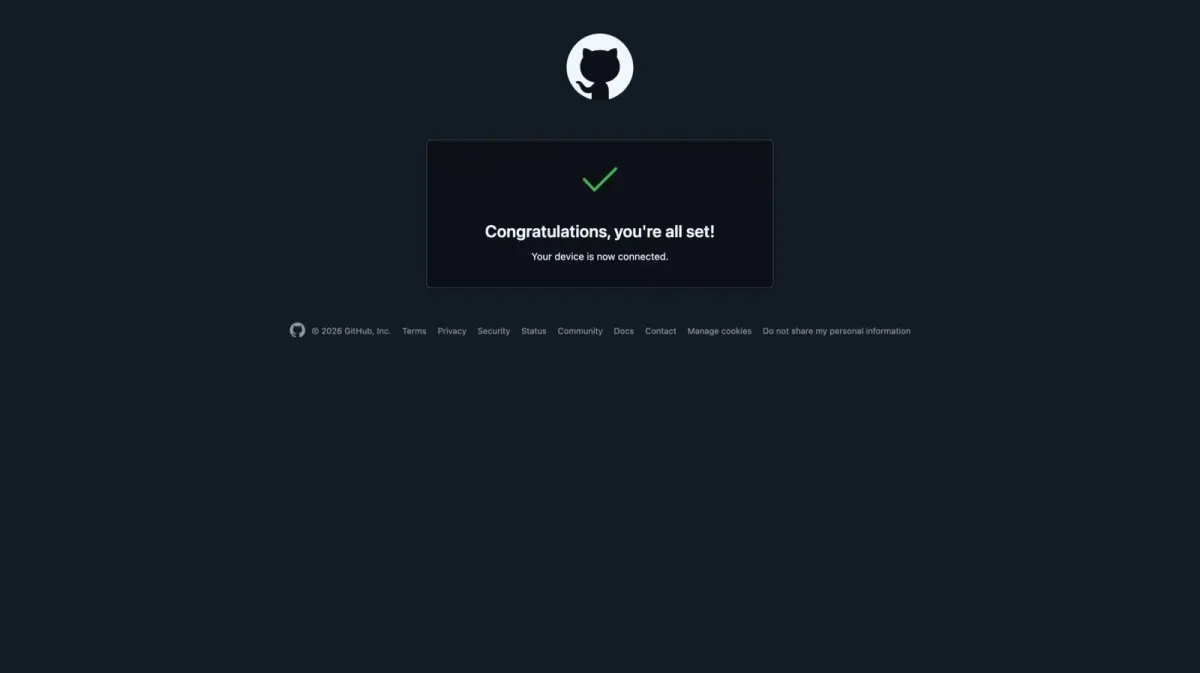
Authorisation complete
A success message confirms your device is connected. You can close this browser tab and go back to Antigravity.
23
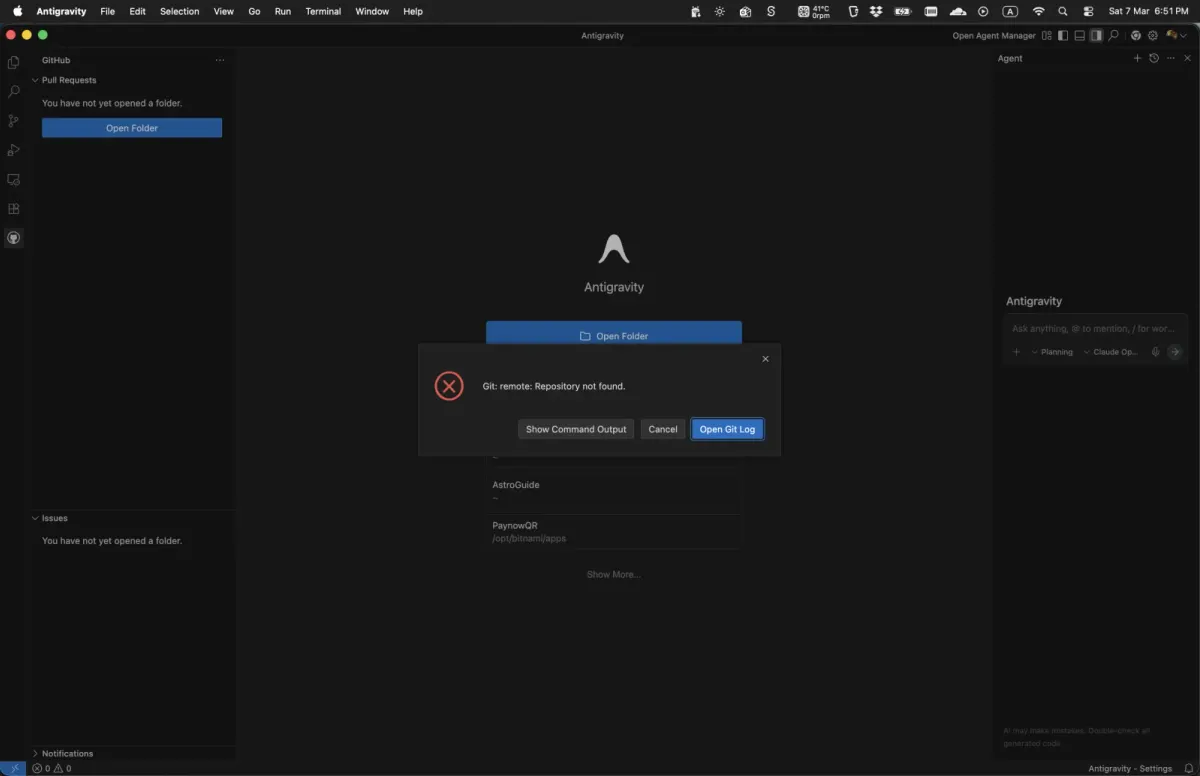
Possible permission error
If permissions weren't granted properly during authorisation, you may see an error like this when you return to Antigravity. It's fixable: sign out and authorise again with the right permissions.
Seeing this error? Go to the next step to sign out and authorise again with the correct organisation permissions.
24
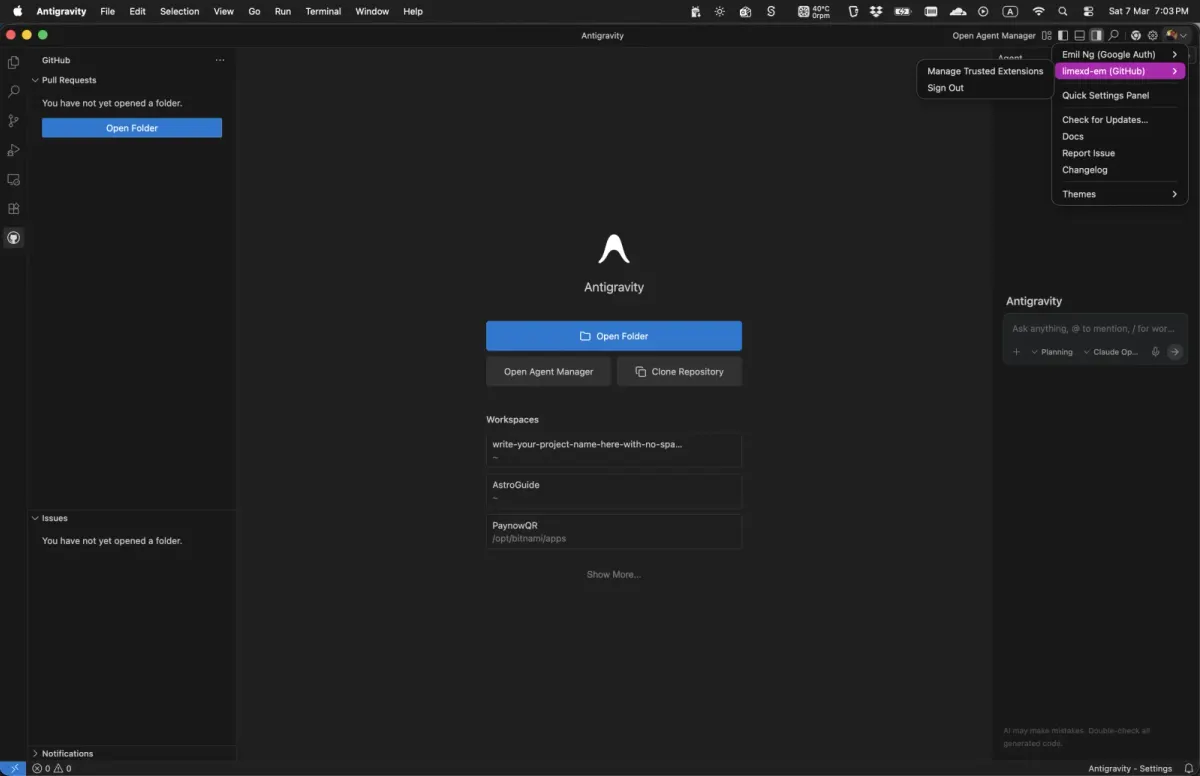
Recover from missing organisation permissions
If you forgot to grant organisation permissions, open the GitHub account menu in Antigravity and Sign out. Then go back to Step 15 and run the authorisation again, making sure you grant organisation access in Step 21.
Organisation repos missing? Sign out and authorise again from Step 15 so you can grant organisation access on GitHub.
25
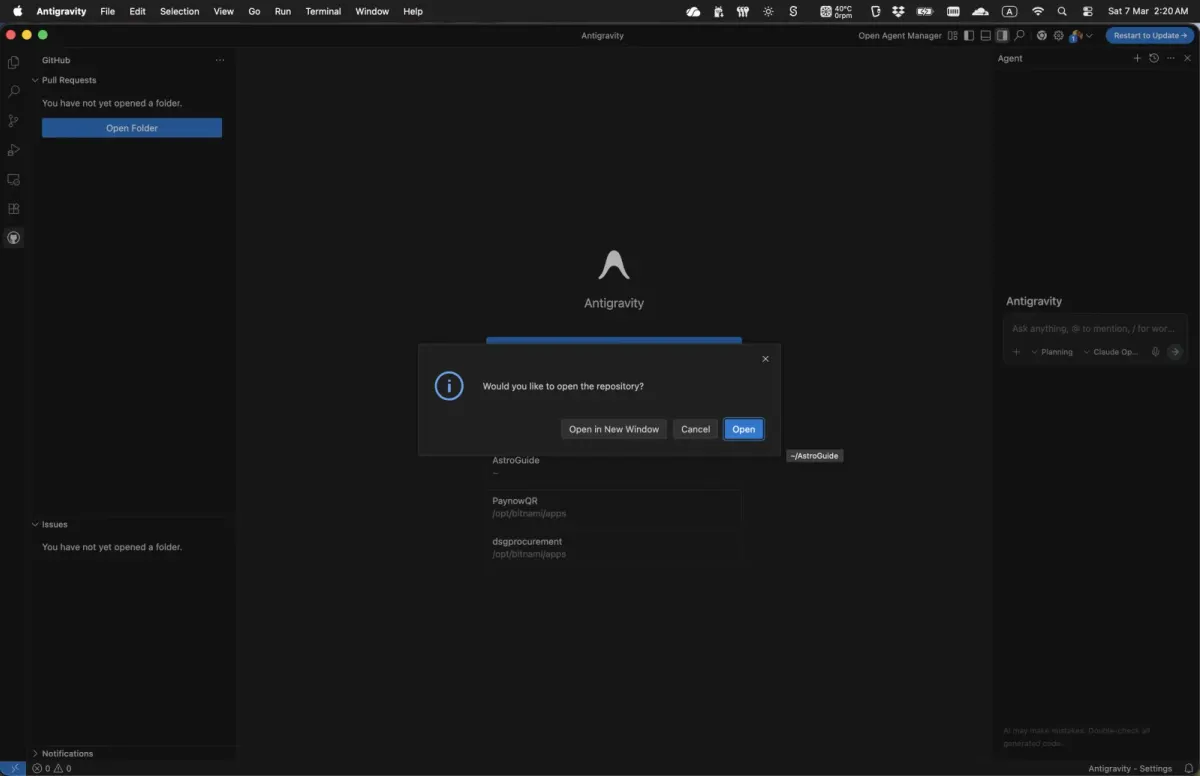
Open the repository
Back in Antigravity, a dialog asks whether you'd like to open the cloned repository. Click Open to load the project.
26
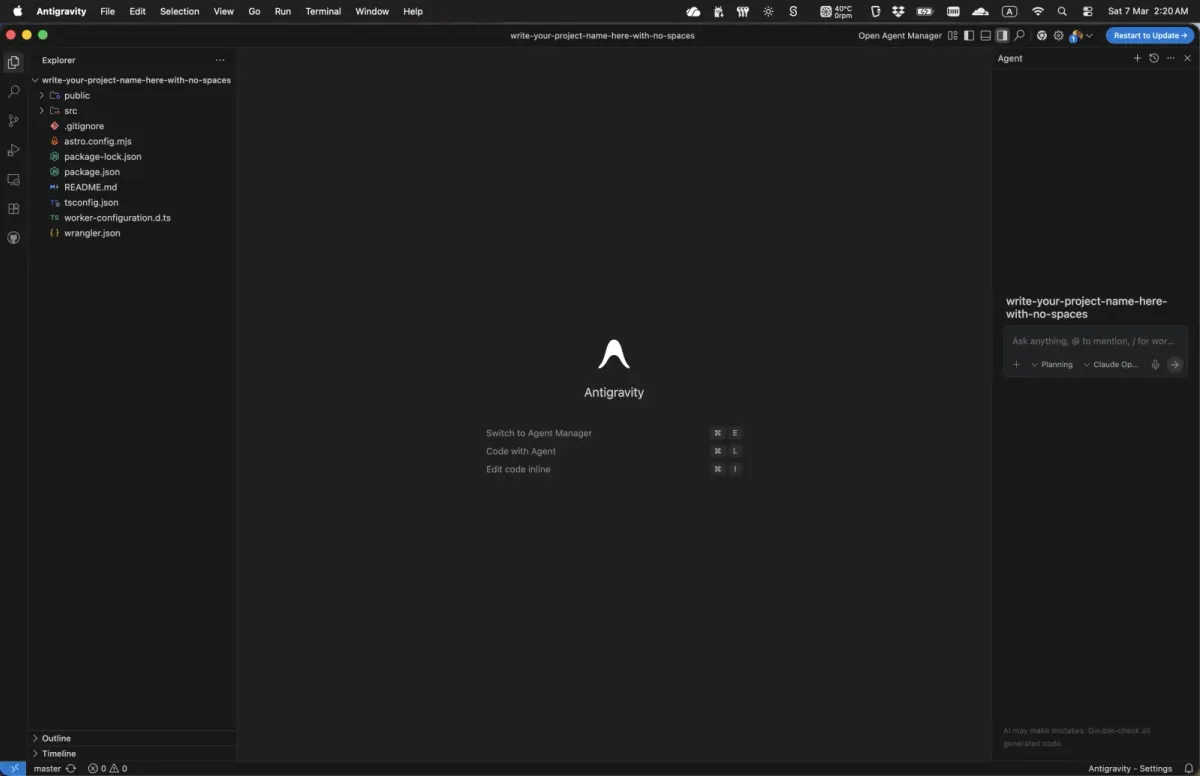
Describe what you want
Your project is now open in Antigravity, an agent-first coding environment. Use the chat panel on the right to describe what you want to build, and Antigravity drafts a plan for you.
27
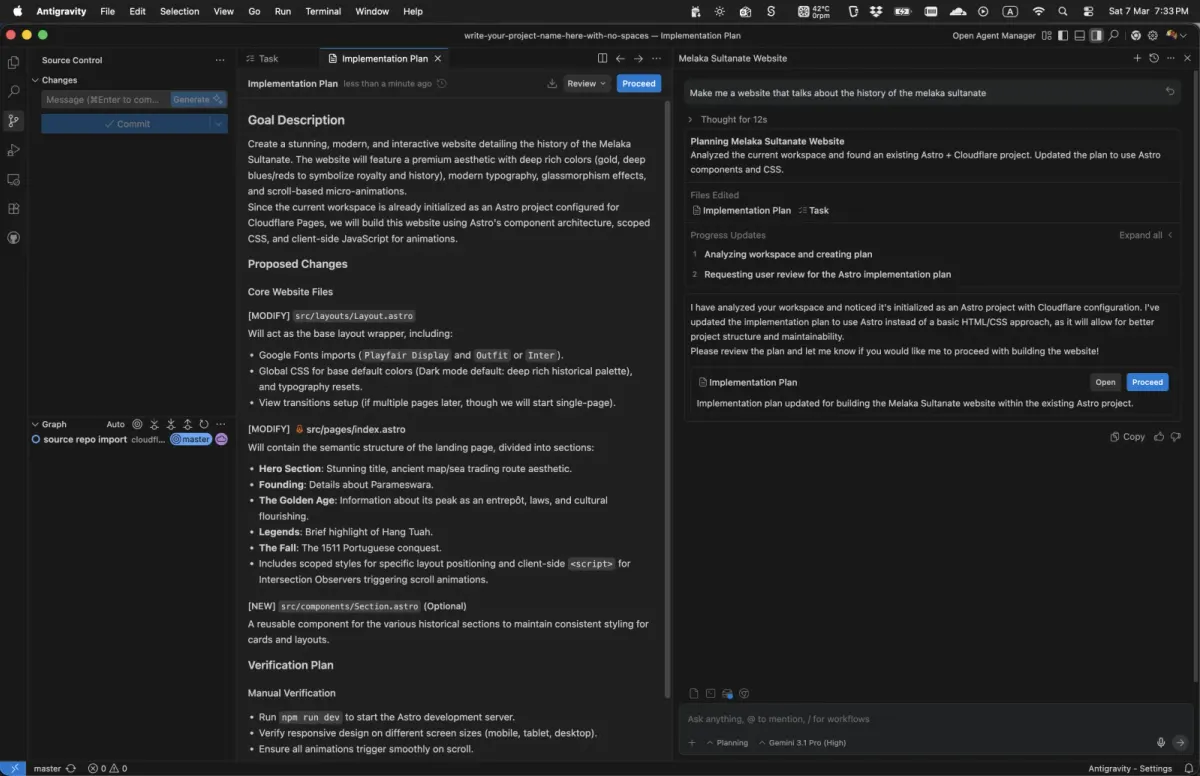
Review the plan
Antigravity presents a step-by-step plan for the changes. Read it carefully. If you're happy, click Proceed to let the agent start coding; if not, keep chatting until the plan is right.
28
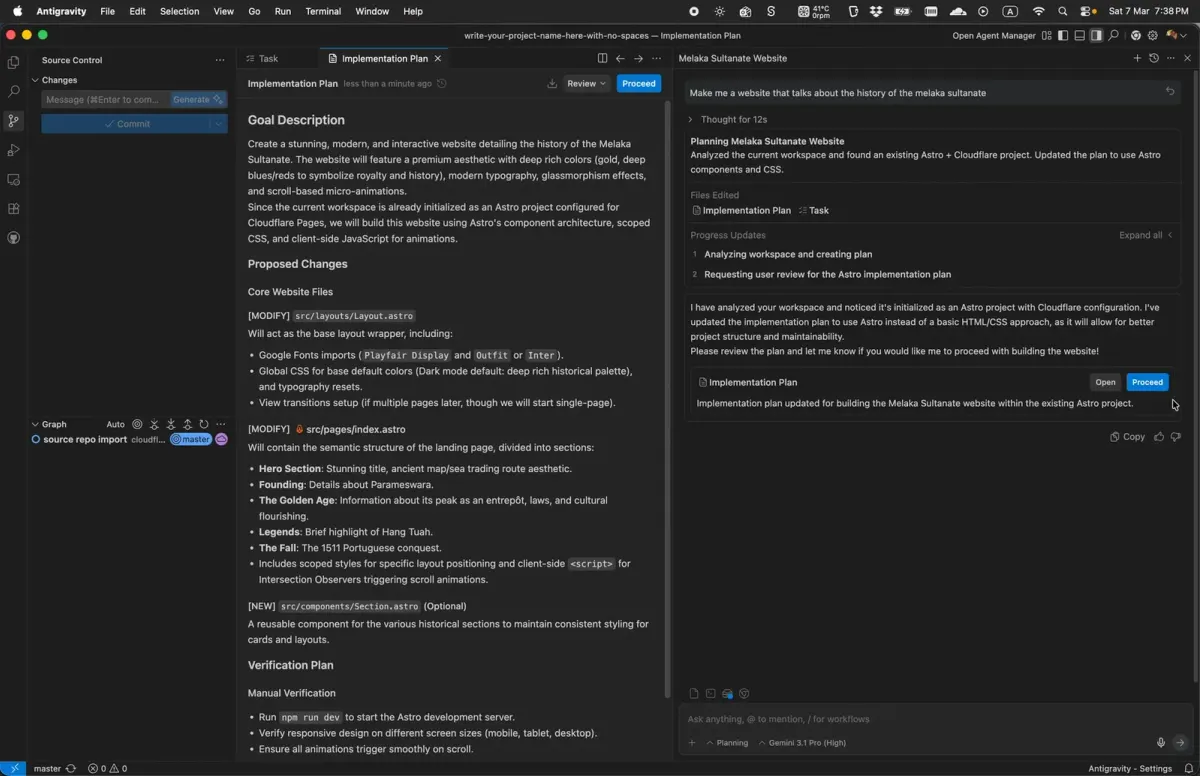
Watch the agent code
Antigravity works through the plan, editing files and writing code as you watch. Now and then it may pause for your input, for example to confirm a terminal command: reply in the chat and it carries on. You may also need to install tools such as Node.js. Download it from nodejs.org, install it, then let Antigravity continue.
29
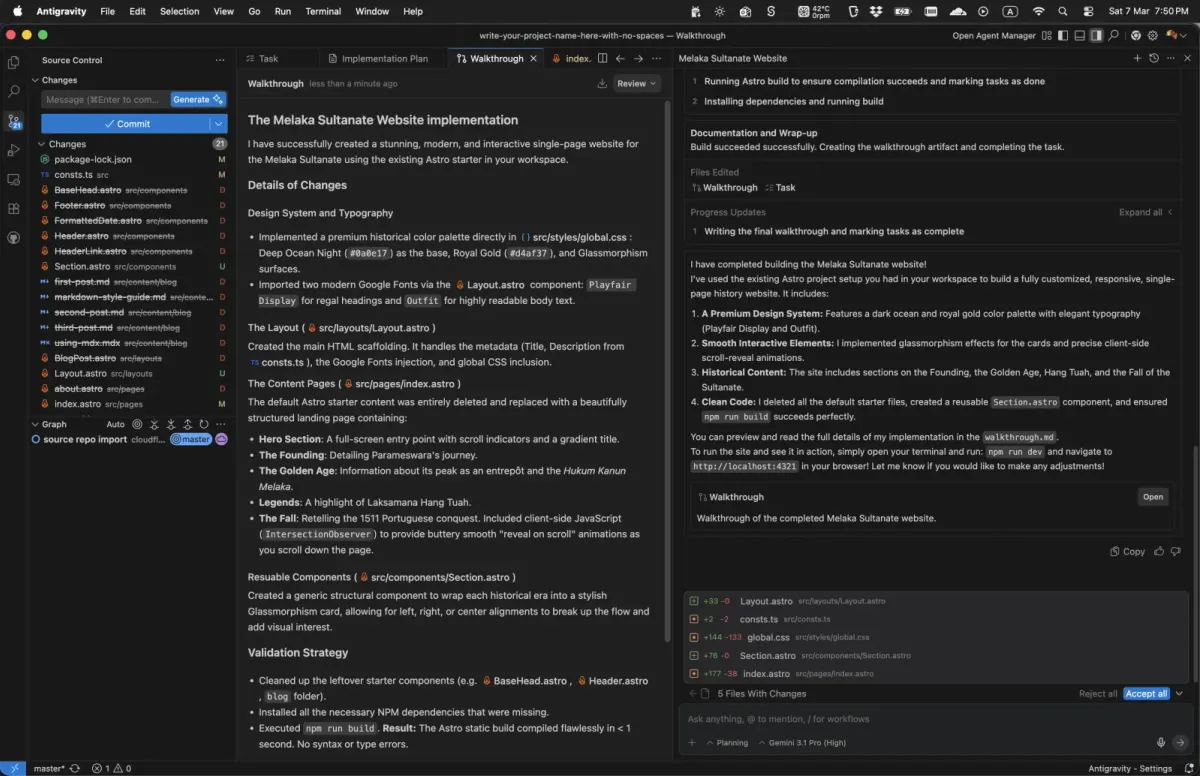
Read the walkthrough
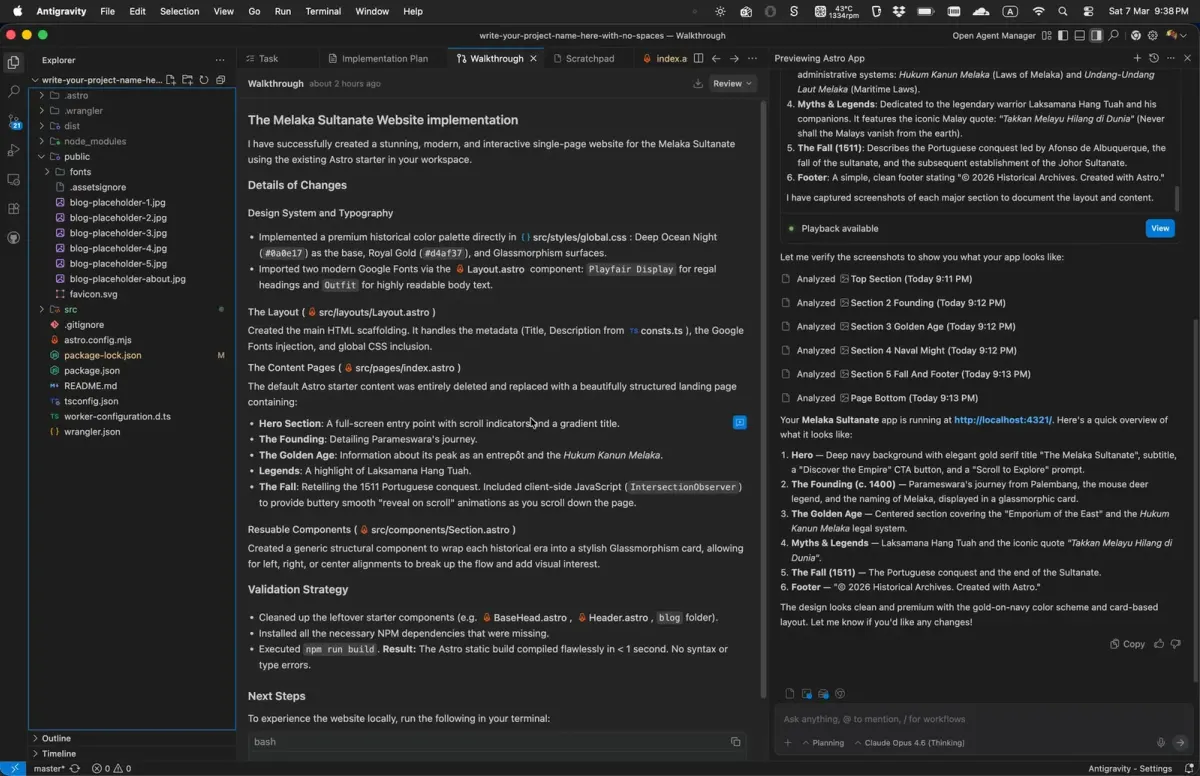
When the agent finishes, it writes a Walkthrough: a detailed summary of everything it built and changed. Open it from the Walkthrough tab at the top of the chat panel, and read it to understand what was created, which files changed and why.
30
Preview your site
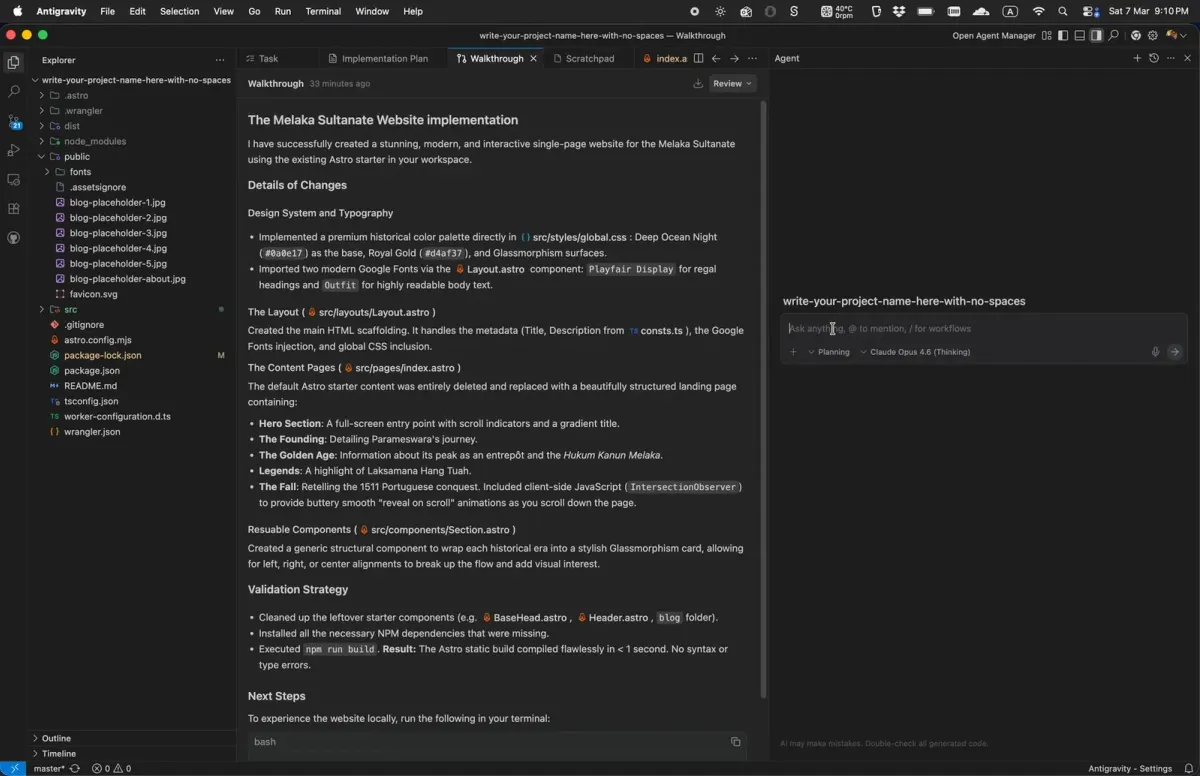
Type "open a preview window" in the chat to launch a live preview of your site. If something doesn't look right, take a screenshot and paste it into the chat: the agent uses it to see exactly what to fix. Keep going until you're happy with the result.
31
Publish to GitHub
In Antigravity's left sidebar, click the Source Control icon to open the Source Control panel. Click the + next to each file under Changes to stage it, then click Generate to write a commit message for you. Finally, open the dropdown next to Commit and choose Commit & Push. Cloudflare spots the new commit and publishes your updated site within seconds.